
Jacket Mould Journey
- eindzelitab
- May 16, 2024
- 3 min read


Jacket moulds are essential in the world of mould-making. It provides you with the ability to cast someone's face as many times as you need for a variety of projects. This blog post will take you through my journey of making a jacket mould for the first time.
Life casting!
The first step in getting this jacket mould done was getting a life cast done. This required a model and a very important assistant. The life-casting process can be intimidating; however, I challenged myself and did it down to the shoulders, which I had yet to do. Here is a quick video of the life-casting process.
It is important to note that there are many important health and safety considerations when life casting!
This life-cast was done with Key-form silicone from Neill's materials.
Tidy it up!
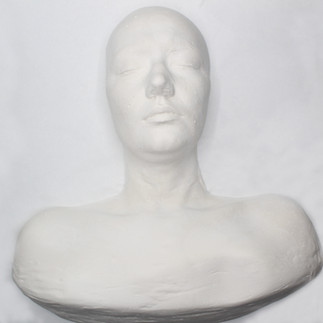
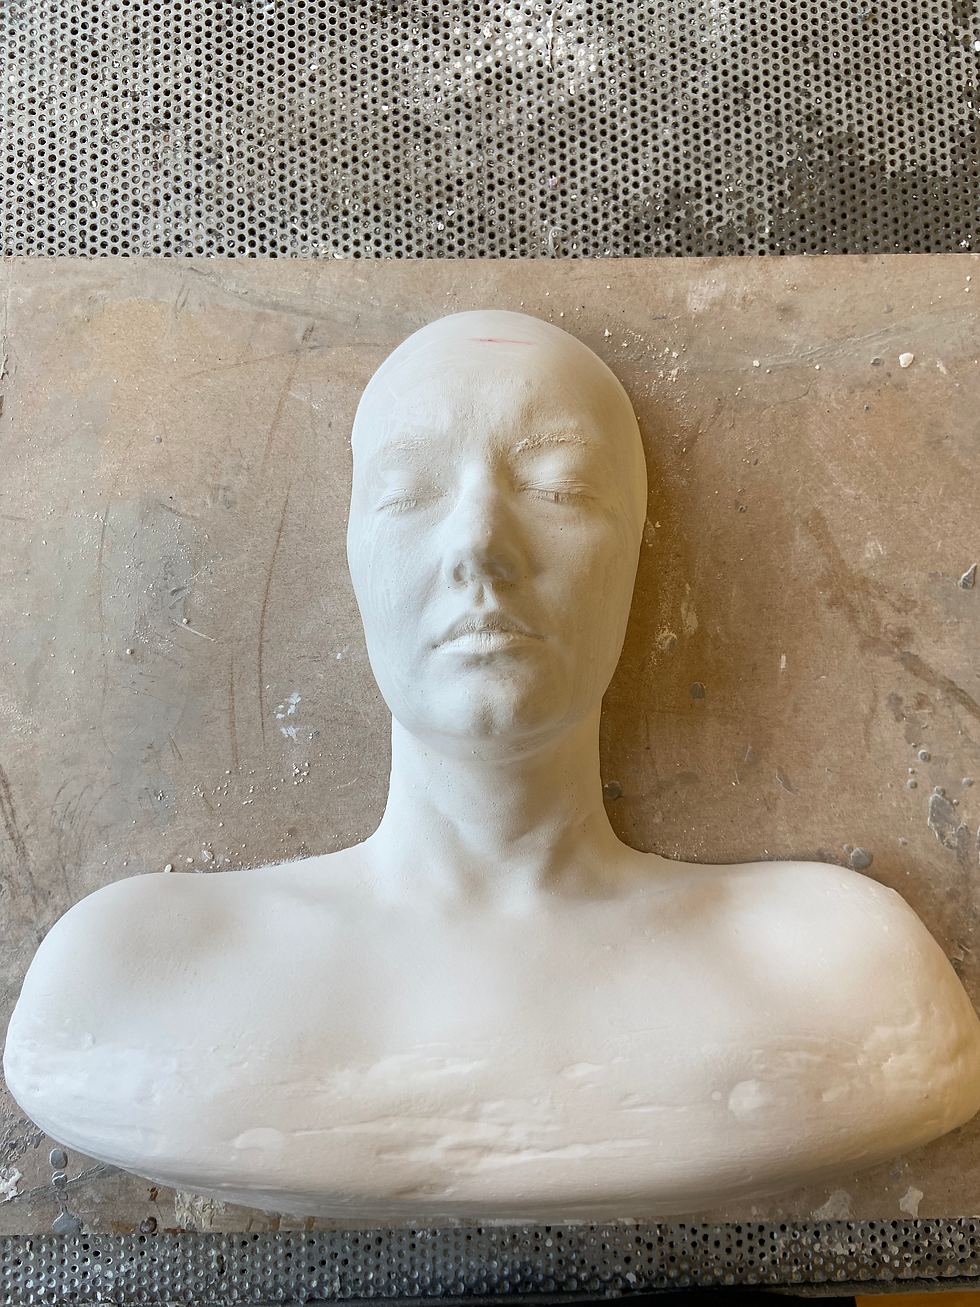
Once the life cast was complete, I filled it with Crystacal R high-strength plaster. Once dried overnight and de-moulded, it is essential to eliminate imperfections, such as bumps from air bubbles and wrinkles from the bald cap, etc.
Before: After:

Soft layer!
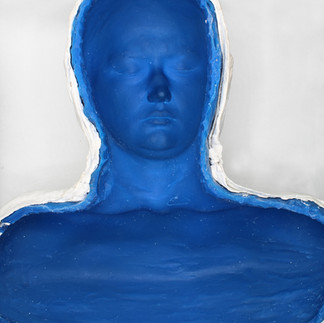
Once the cast was tidied up, I used Vaseline and a silicone release spray all over the cast to have an easier time de-moulding once the mould was finished. I then started applying the silicone onto the cast, which will be the soft inner layer of the completed mould. This layer is essential as it captures the detail of the cast and is later responsible for multiple castings, hence why silicone is used for this layer.
The silicone used for this process was Platsil gel 10 from Neill's Materials as it is more viscous than Platsil gel 25, deeming it more suitable for a brush-up mould as it can be controlled more easily. However, a thixotropic is often used to thicken the silicone for an easier time brushing it on. Unfortunately, I did not use it, which was my mistake; I naturally thickened the silicone, letting it cure at least a quarter of the way before brushing it on, which had the same effect.
Rigid layer!
The final step of this mould was to create a rigid outer layer to provide it strength and help it maintain its shape. I used the same technique as with life casting due to having access to a limited range of materials. That being said, mod-roc was used to create the outer layer, and later, I brushed on thickened plaster for extra support and to smooth everything out.
There we have it! The mould was then completed. All that was left to do was to carefully de-mould it. I did this by carefully ensuring the mould was flat and loosening the rigid outer layer away from the silicone layer. Once the rigid layer came off the mould, I could carefully peel away the silicone layer from the plaster mould and put it back into the rigid layer.
Casting moment of truth!
It was time to cast out my brand-new jacket mould and see if it worked. This process was simple: I sprayed a silicone release spray onto the inner layer of the mould, mixed up some Cystacal R plaster and carefully poured it in, ensuring the mould was sitting even on the table to avoid it tipping over and making a mess! I left that to sit overnight, and then it was time to hold my breath and de-mould it.
The cast came out perfectly! Apart from a few air bubbles, the mould does its job effectively.


To summarise, a jacket mould is beneficial for creating prosthetics fitted to someone's face. It saves time by being able to cast multiples of someone's life cast, especially if there is a large team working on a project. So, even if the process is quite time-consuming, it saves time in the long run.
Thank you for reading!


Comments